From model to image
![]()
Rendering is the process of turning 3D models into images by using rendering software. The software can be included with the CAD program itself or sold as a separate product. In my experience dedicated software will do a better job most of the time. Some popular alternatives are:
For rendering products my personal favourite is KeyShot due to its great usability and high quality output. With KeyShot you can create some amazing looking stuff without ever having watched a single online tutorial. For architectural renders I have heard Maxwell is great but I cannot say for certain as I have not used it myself.
Over the past couple of years rendering has taken over a large part of the work that used to be reserved for product photographers. This is understandable as setting up a shoot can be time consuming and expensive. With software on the other hand you can turn out dozens of perfectly clean images with major changes in colour and composition in the span of an hour.
Tips for creating great looking renderings
There will be a lot of nuances depending on which software you are using, but there are some high level concepts that are always applicable that I will go over here.
#1 Use a good 3D model
The quality of the 3D model you are using will set the upper limit for how lifelike your rendering will be able to look. This means that if you are in charge of the CAD model you should not cut any corners. Make sure to separate surfaces and to detail every little screw and bump you can think of. If small details are lacking the brain will notice and not allow itself be fooled into thinking that it is seeing a real photograph.
#2 Round all edges
If we look closely at objects, we realise that there is always a small radius around the edges and corners. When we render this edge in software it will create a small reflection of light which adds yet another level of detail, convincing our brain that the object is real.
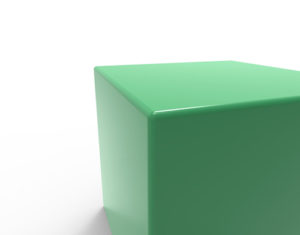
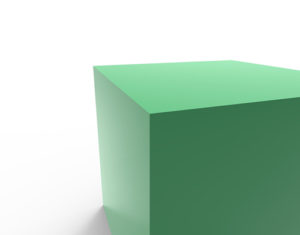
As you see in the images above the reflection on the fillet helps a lot in creating a realistic look.
#3 Avoid using absolutely pure colours
With “pure” colours I mean those that are monotone in their composition, such as black (RGB 0, 0 ,0), white (RGB: 255, 255, 255), green (RGB: 0, 255, 0) and so on. There are no materials with that color in nature so using them in the rendering software will produce artificial looking results. Surfaces that use absolute black will for example in some programs not reflect any light and look like black holes.
Basically you can summarise this tip as the following: stay away from the edges on the standard colour pallet.
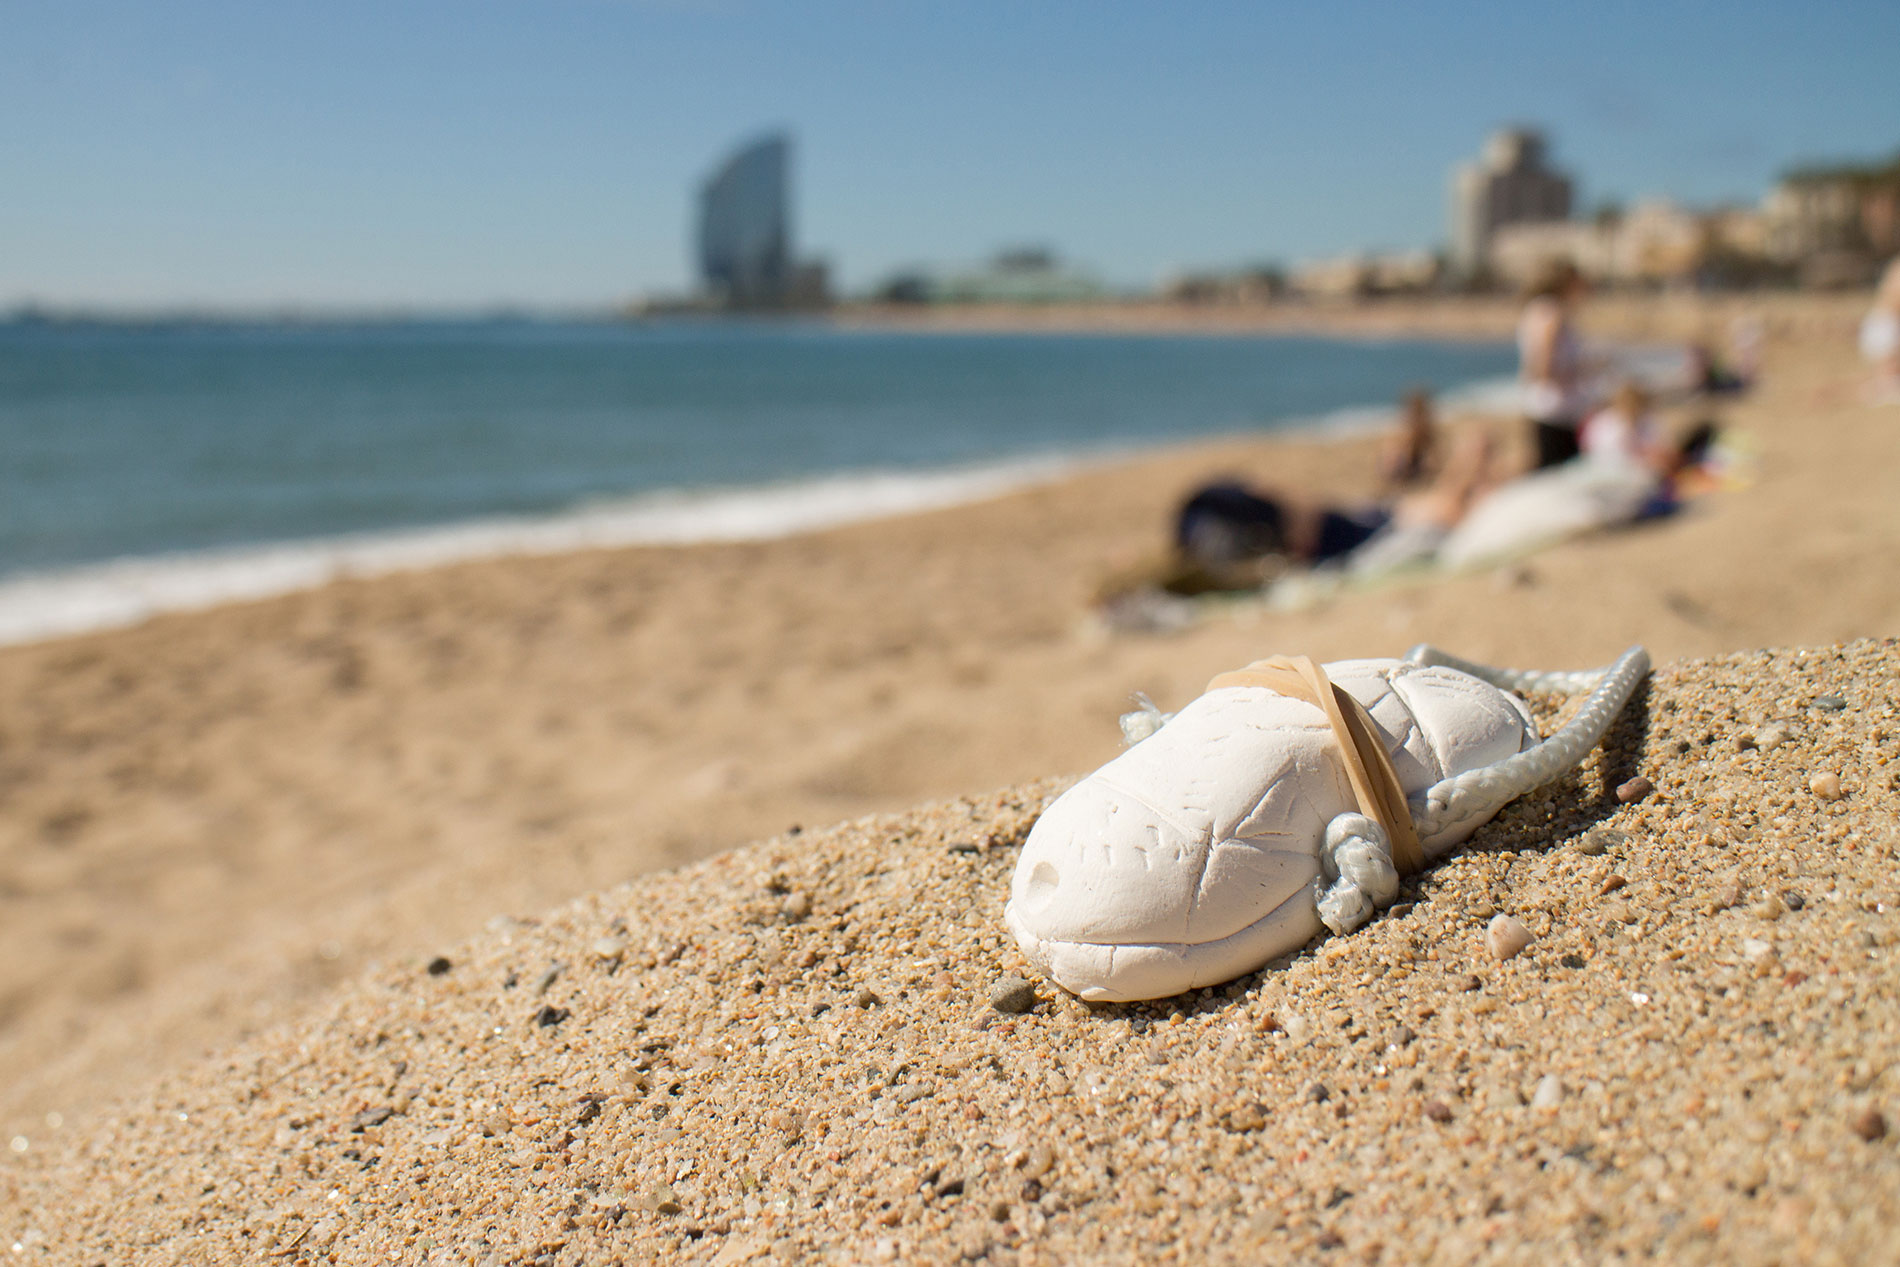
#4 Use models to blend reality with CGI
For images where you want the rendered model to be in a real life environment, creating a simple physical model can be useful. The model can be placed in the environment to create shadows and add elements of non-CGI into the image. Below you can see the clay model used and the resulting images I got when working on the BeachBug.


![]()
The model not only creates lifelike shadows on the sand, but also adds the strap to the product. Having one part CGI and one part real is an effective way to trick our mind. It seems that if the brain can identify some parts of the image as real, it will be more willing to look over other parts that would look artificial on their own.
#5 Play around with the software
Each program is different from the other, and even the most user-friendly ones like KeyShot take time to master. So do not be afraid to play around with the software, after all, it is fun! Want to know how the product would look if made completely out of diamond? Just switch the material and see the crazy results.
Rendering models is one of my favourite parts in the design process. To go from the boring grey of a CAD program to seeing how your product might look in reality is exhilarating.